Create a Survey
Learn how to collect user feedback with a survey using Flows and the Survey Popover component.

Surveys are a powerful way to collect structured feedback from users without disrupting their experience. In this guide, you'll learn how to set up a survey using Flows and the Survey Popover component from the Basics V2 library.
Preparation
Before getting started, make sure you have the following in place:
- ✅ Flows SDK is installed in your product
- ✅ Basics V2 components package is installed and the library is enabled in the Flows dashboard
If you haven't done this yet, follow the Quickstart guide and the Basics V2 installation guide first, then come back here.
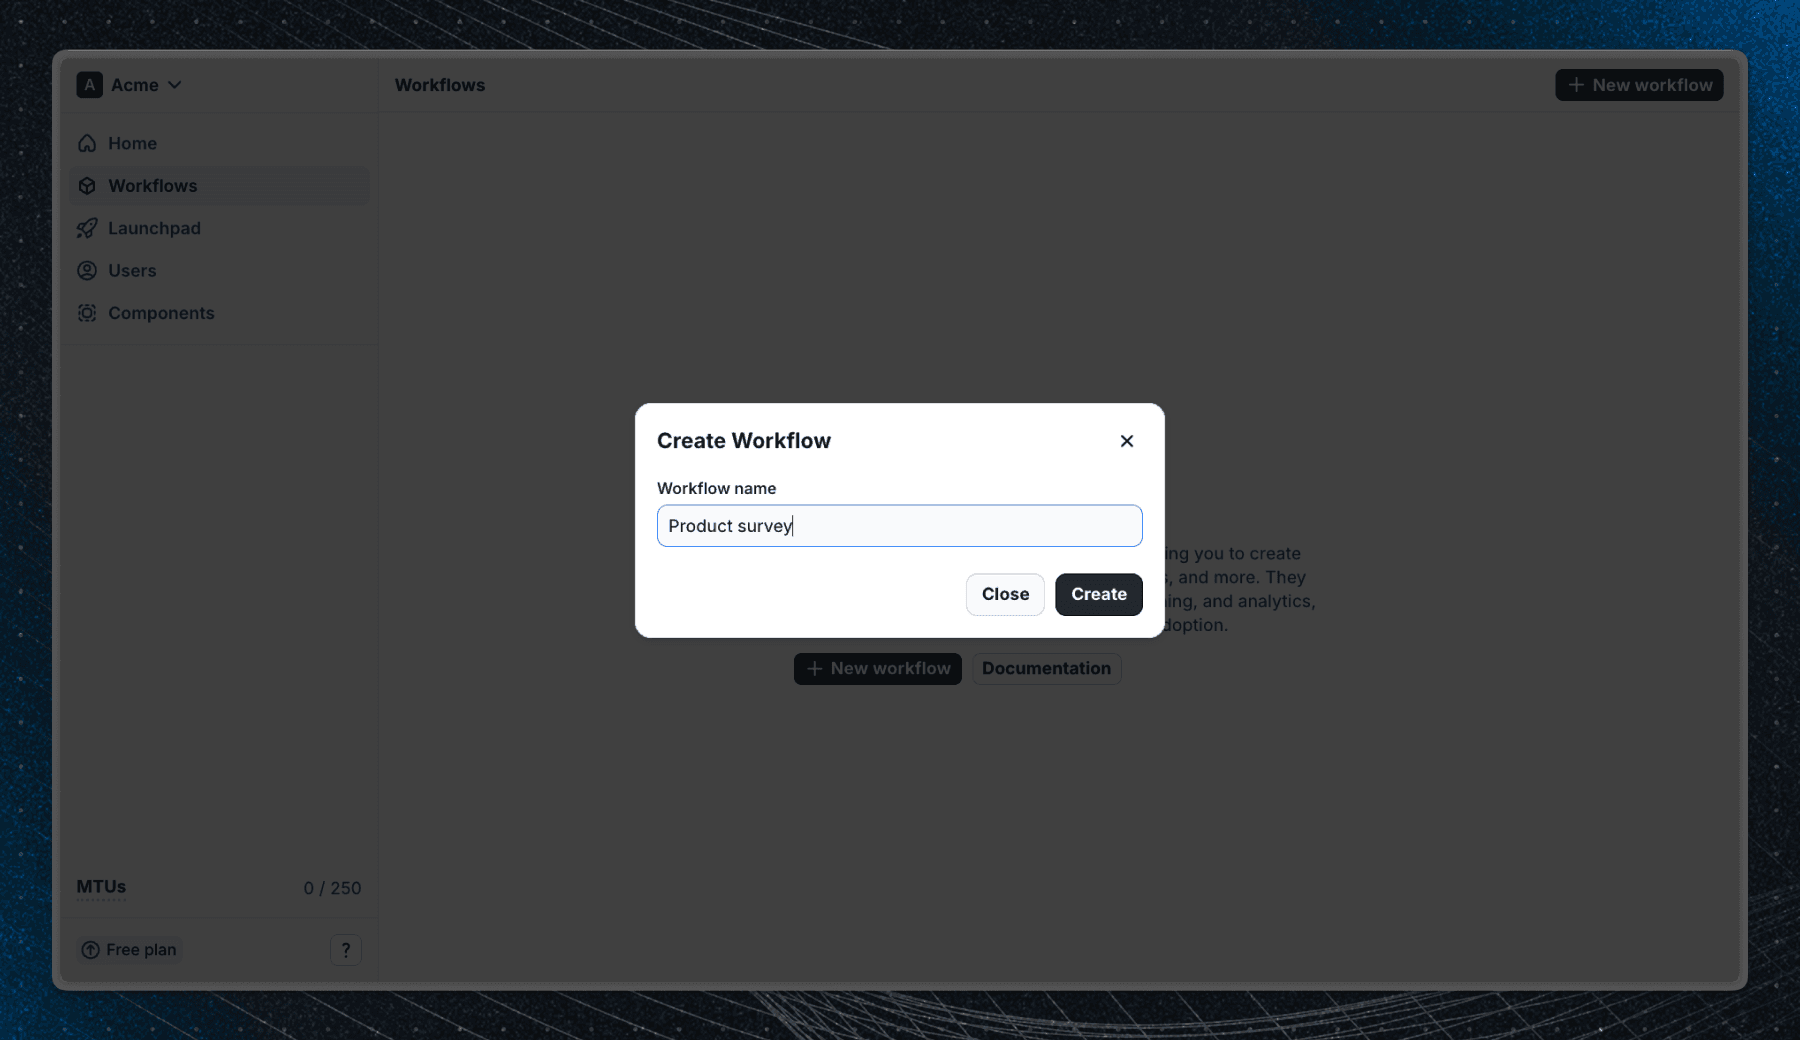
Create a workflow
Workflows are where you define user experiences. Each workflow contains the logic and content for your survey.
To create a new workflow:
- Go to the Flows dashboard and click Workflows in the sidebar.
- Create a new workflow.
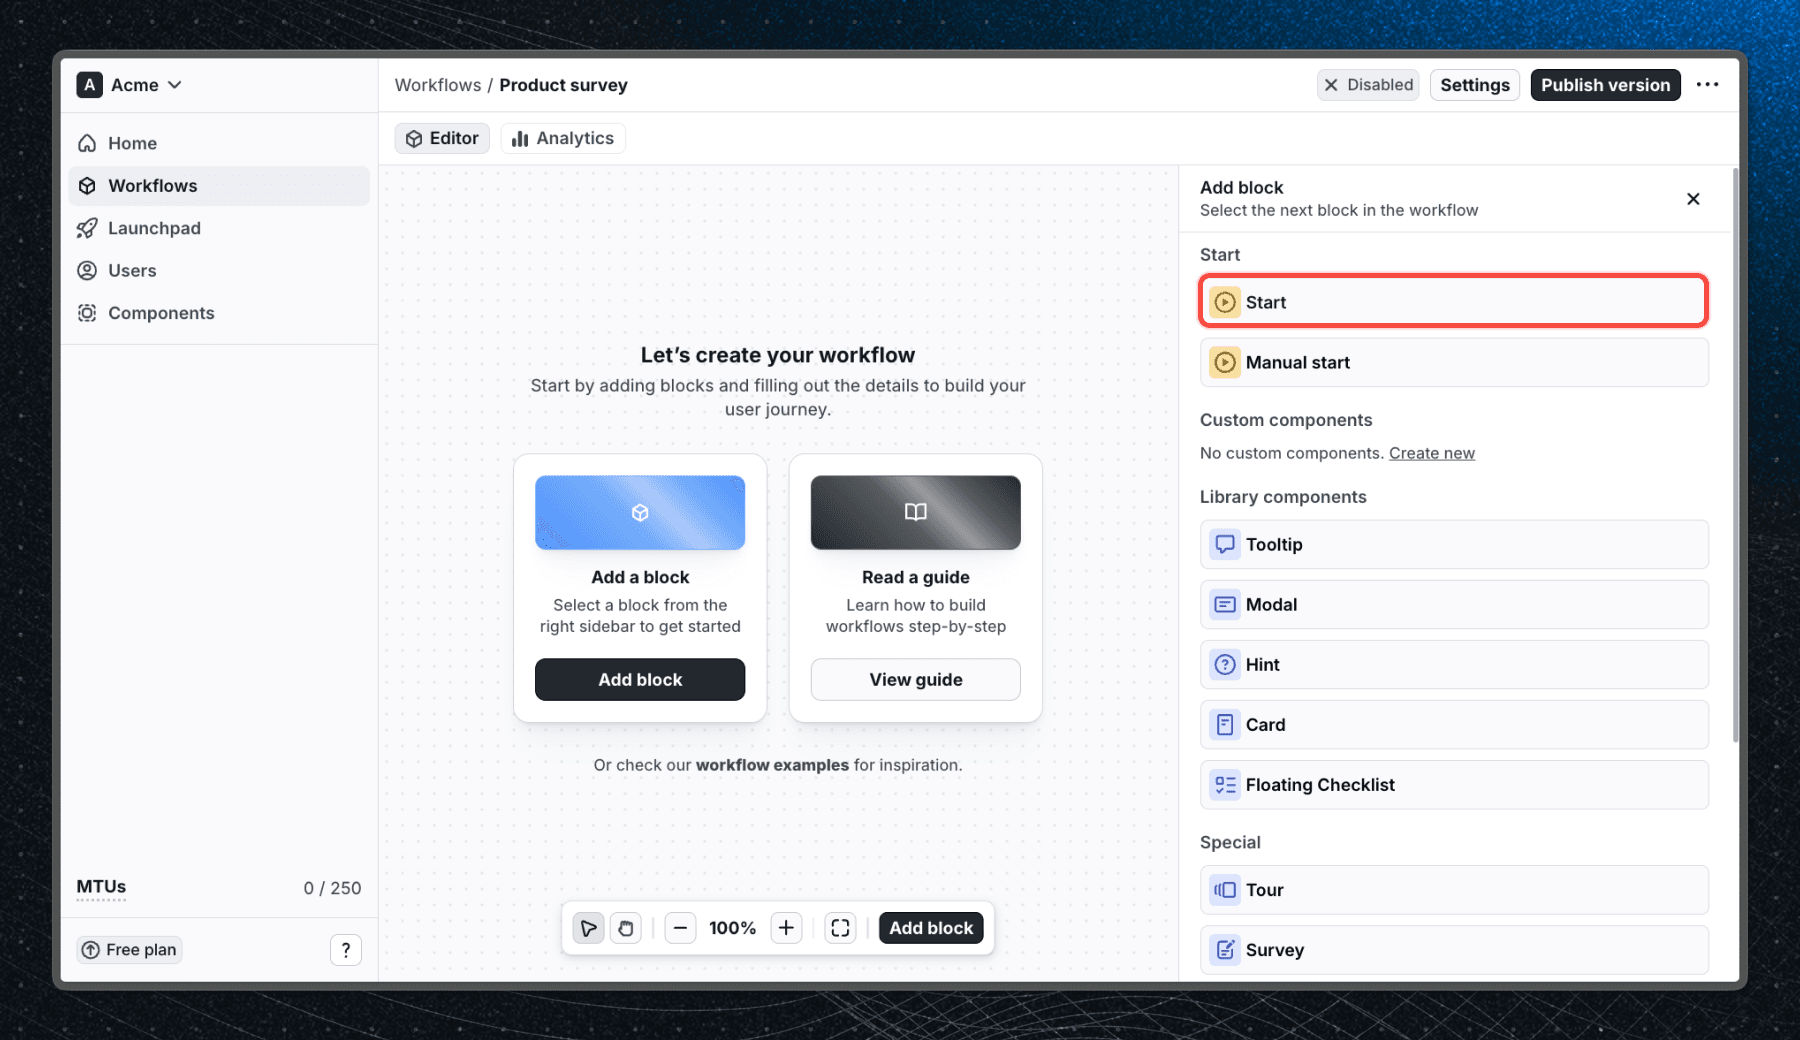
You'll start with an empty canvas. Add a Start block to define when users enter the workflow. For now, leave the Start block without any user property filters so that any user can enter the workflow.
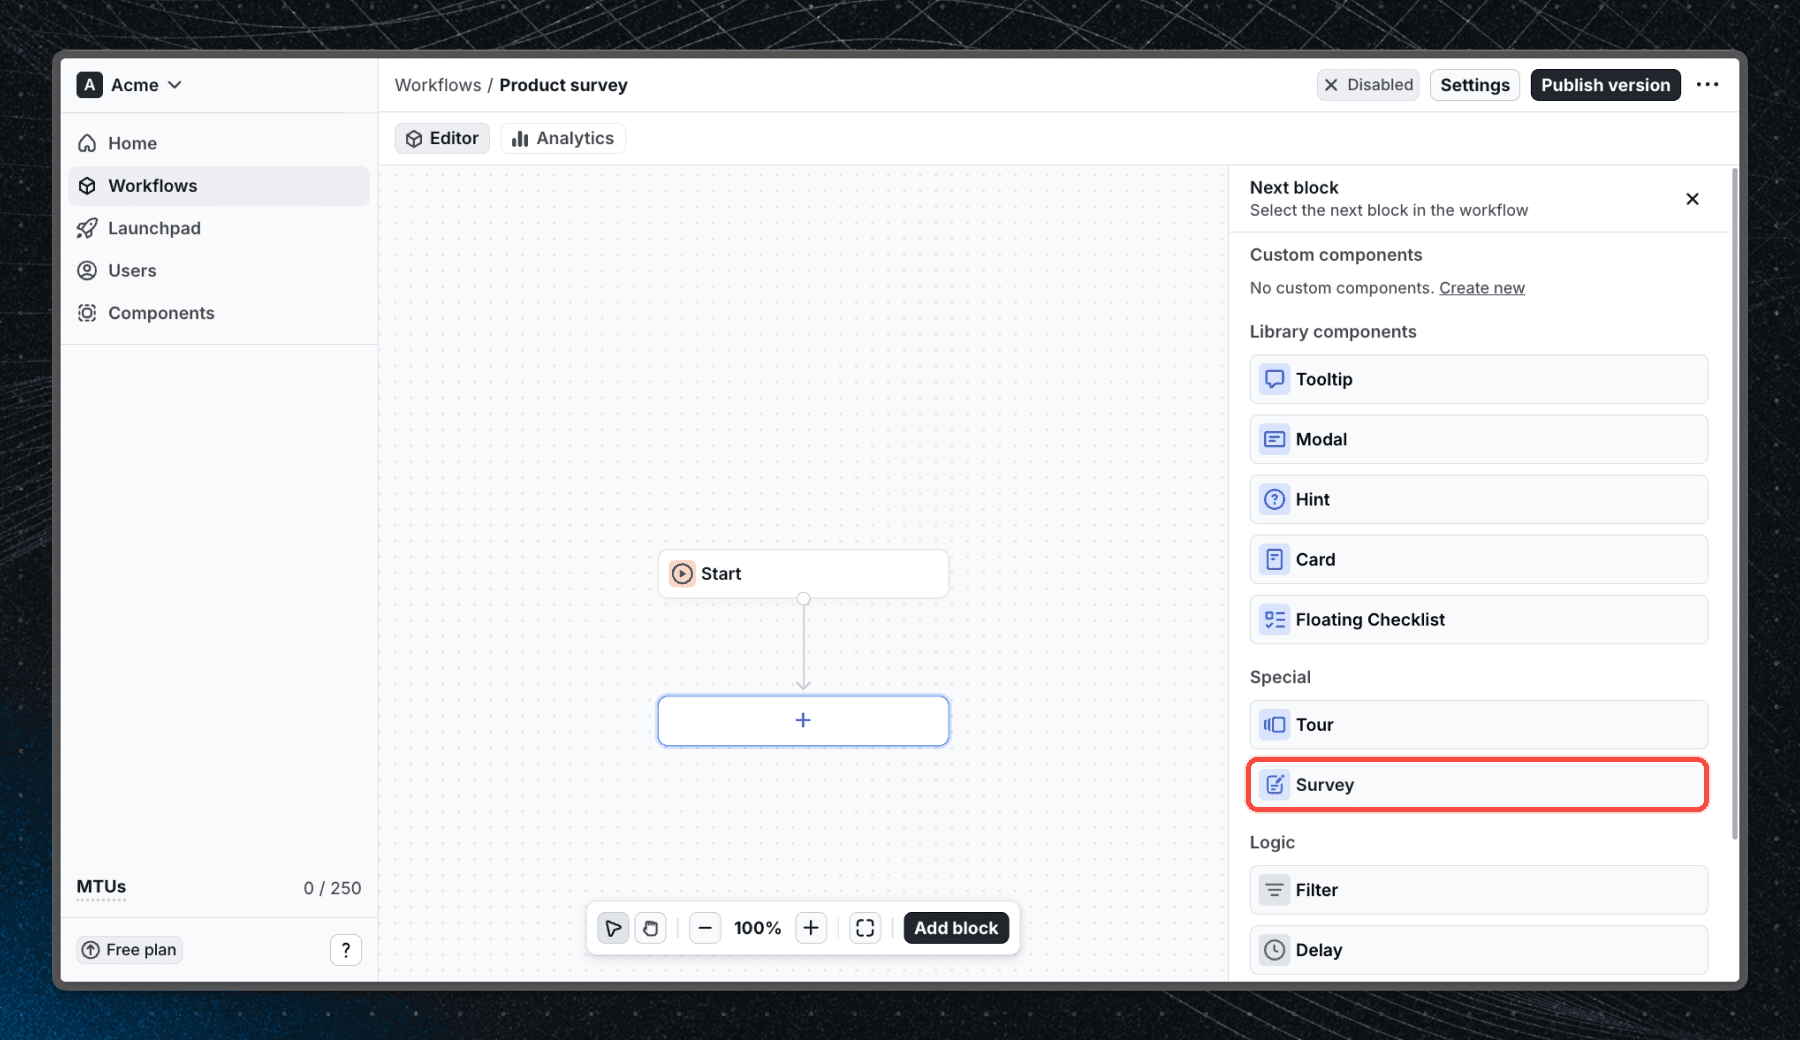
Add a survey block
Click the blue + under the Start block and select Survey from the list of available blocks. The Survey block will automatically connect to Start.
Add questions
Now it's time to build the survey. Click Add question inside the survey block to start adding questions. You can mix and match different question types depending on the feedback you want to collect.
Add a rating question
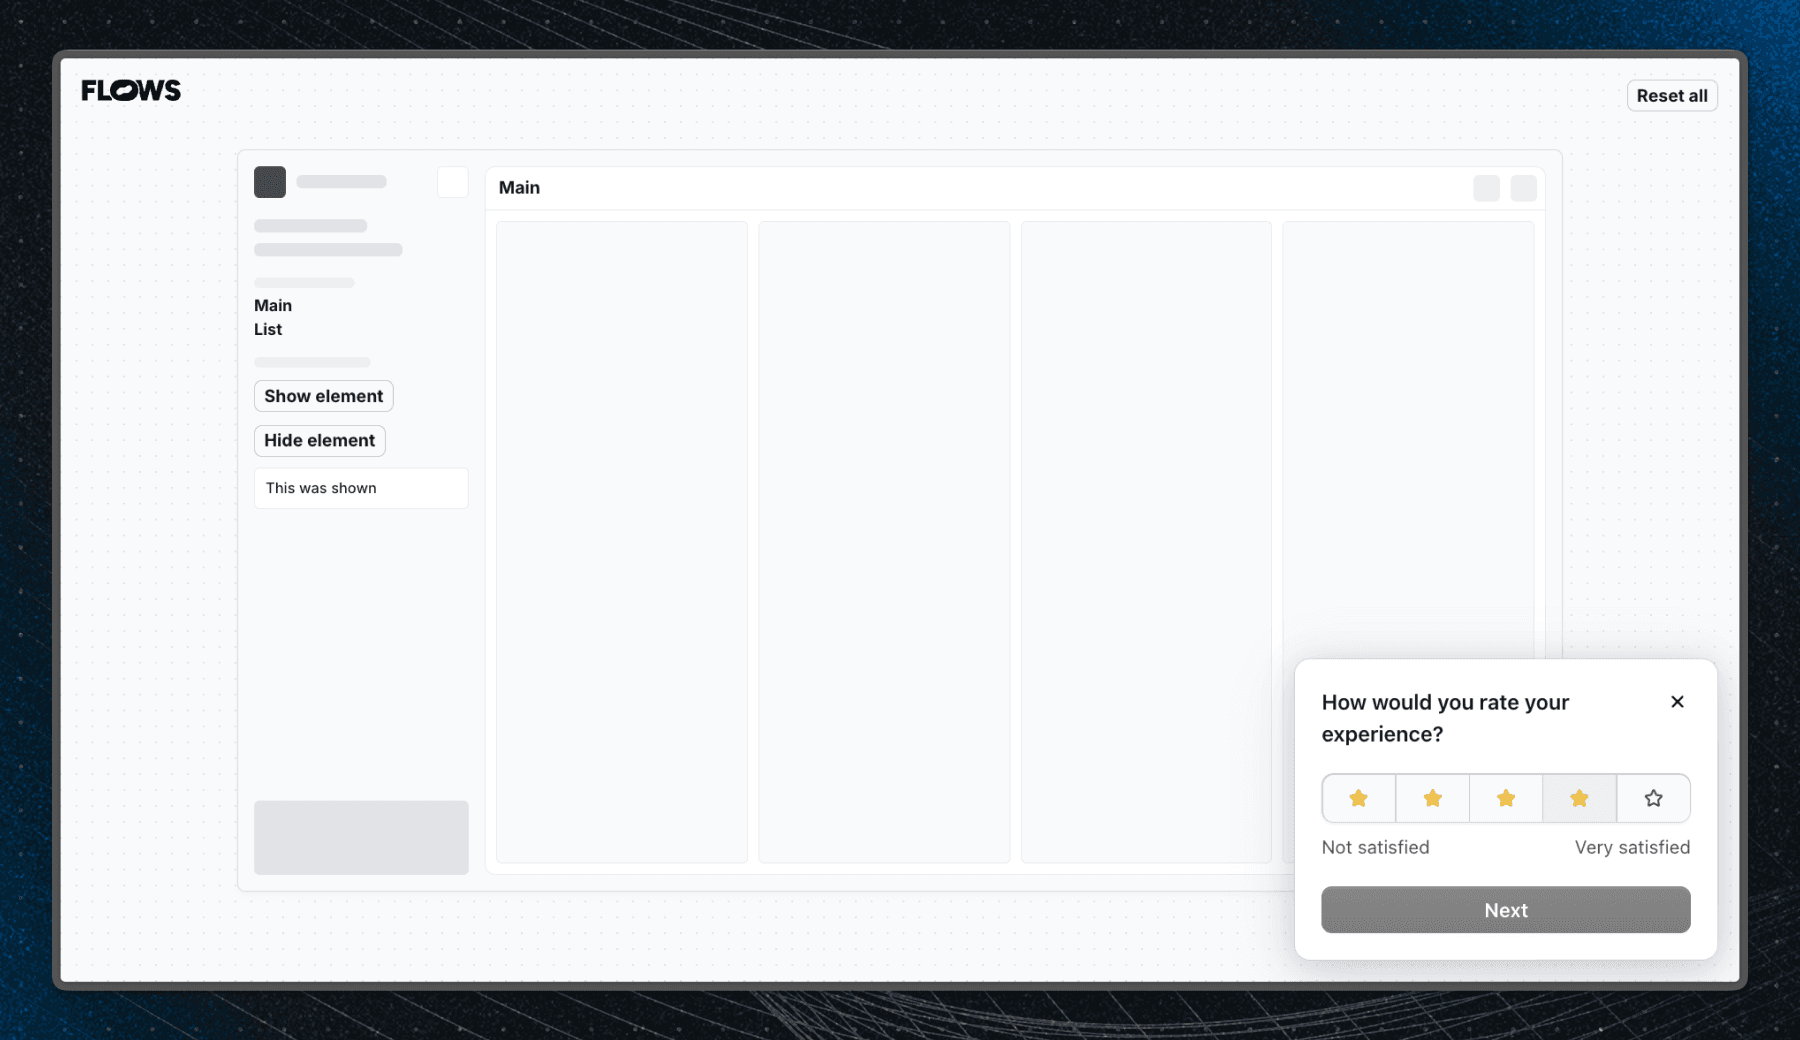
Start with a Rating question to get a quick sense of user sentiment.
- Click Add question and select Rating.
- Set the Display to Stars and the Scale to 1-5.
- Add a Lower label (e.g. "Not satisfied") and an Upper label (e.g. "Very satisfied").
- Write a clear Title for the question (e.g. "How would you rate your experience?").
Add a freeform question
Follow up with a Freeform question to collect open-ended feedback.
- Click Add question and select Freeform.
- Write a Title (e.g. "What could we improve?").
- Optionally add a Placeholder to guide users (e.g. "Share your thoughts...").
- Enable Optional if you don't want to require an answer.
Add an end screen
Every survey should finish with an End screen to confirm that the response was submitted.
- Click Add question and select End screen.
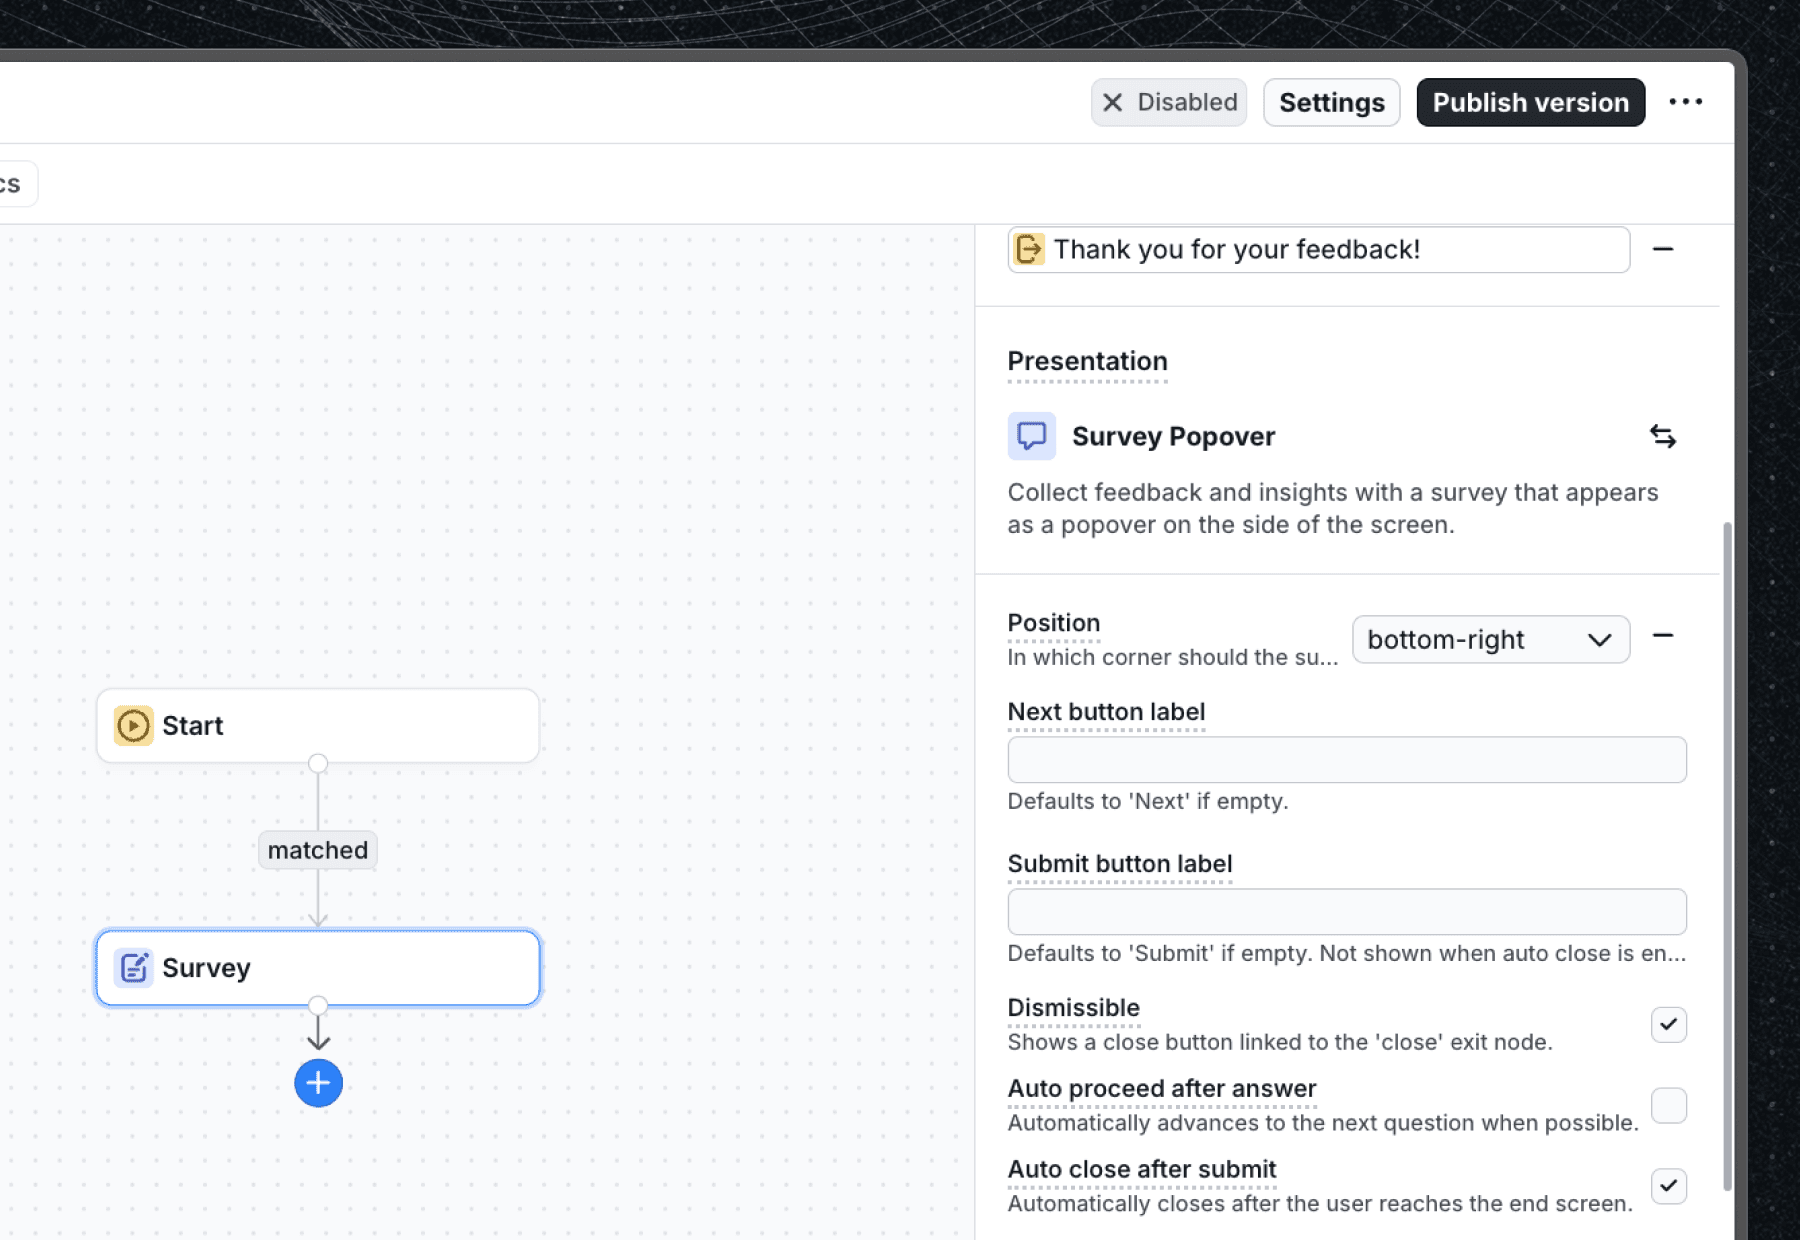
- Write a Title (e.g. "Thank you for your feedback!") and a short Description.
- Set a Button label (e.g. "Done").
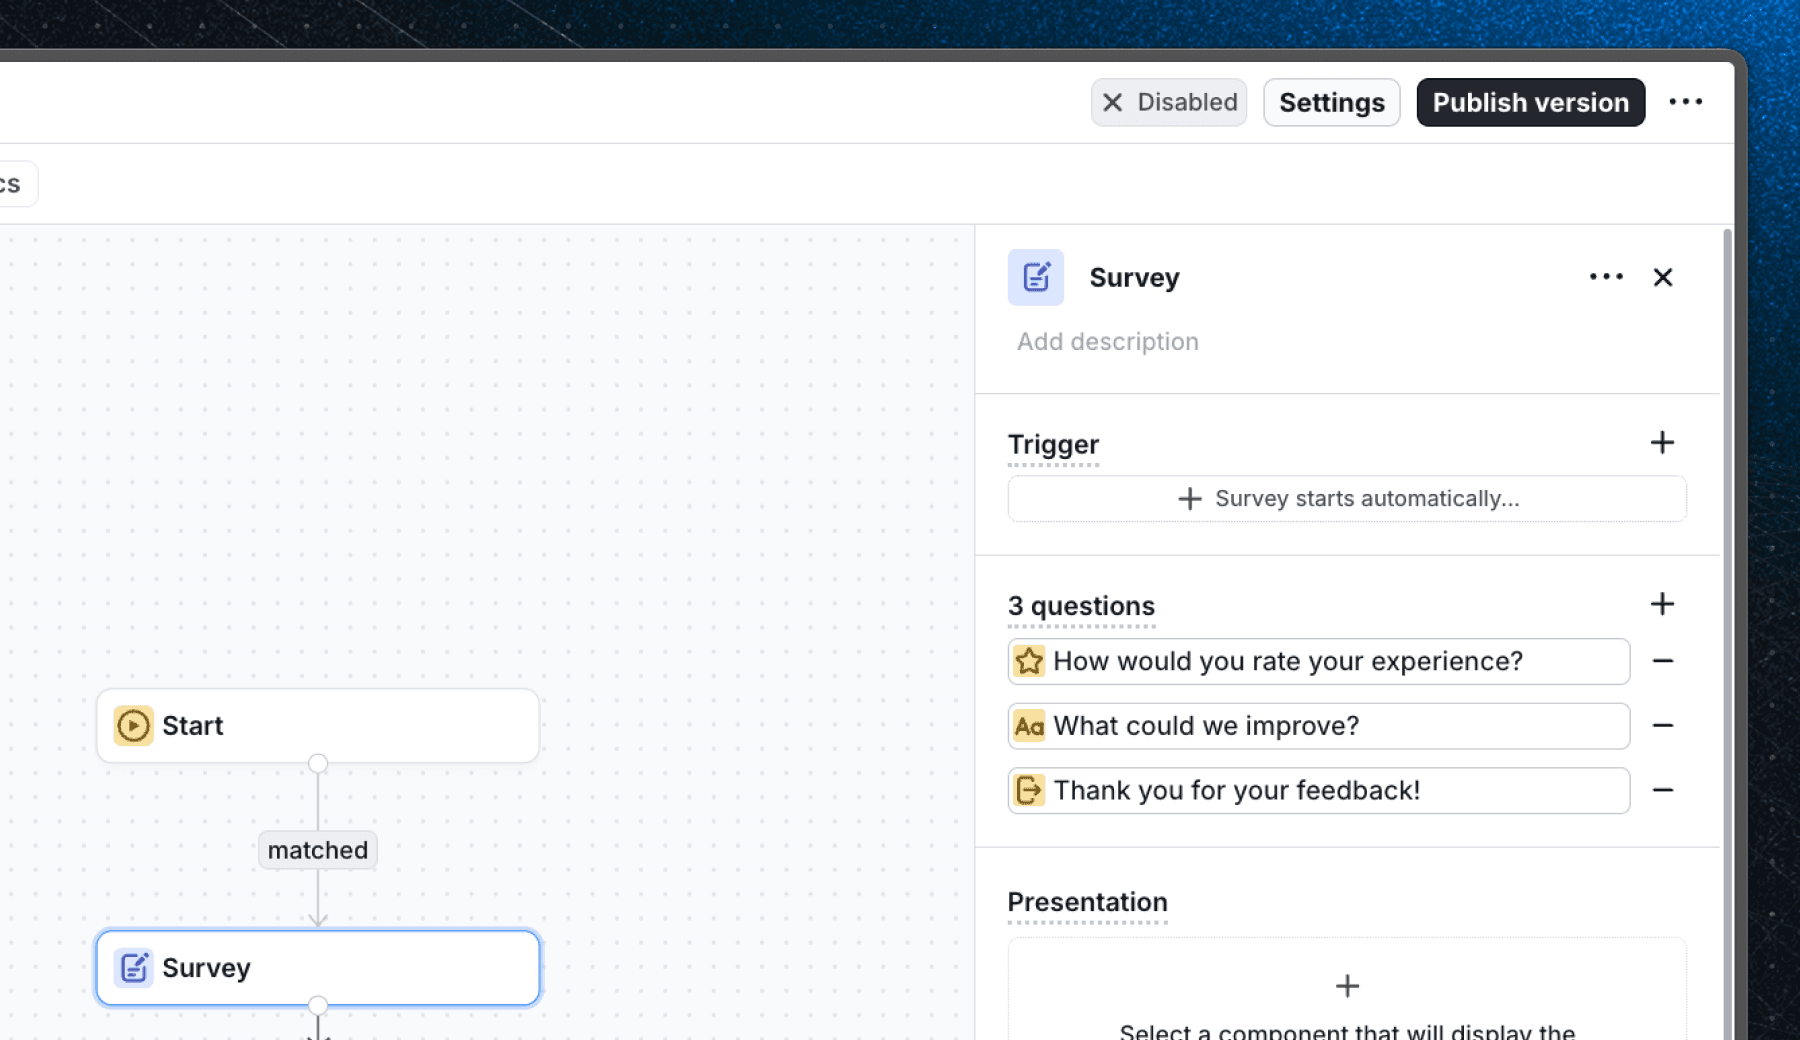
Select the Survey Popover component
With the Survey block selected, find the Presentation section in the left panel. This is where you choose which component renders the survey UI to your users.
Click the component picker and select Survey Popover from the Basics V2 library. This is the built-in popover component designed specifically for displaying surveys.

Once selected, the Survey Popover will appear in the Presentation section. You can configure its properties - such as position and size - directly from the block editor.
Test your survey
Before publishing to real users, verify that the survey works correctly in your application.
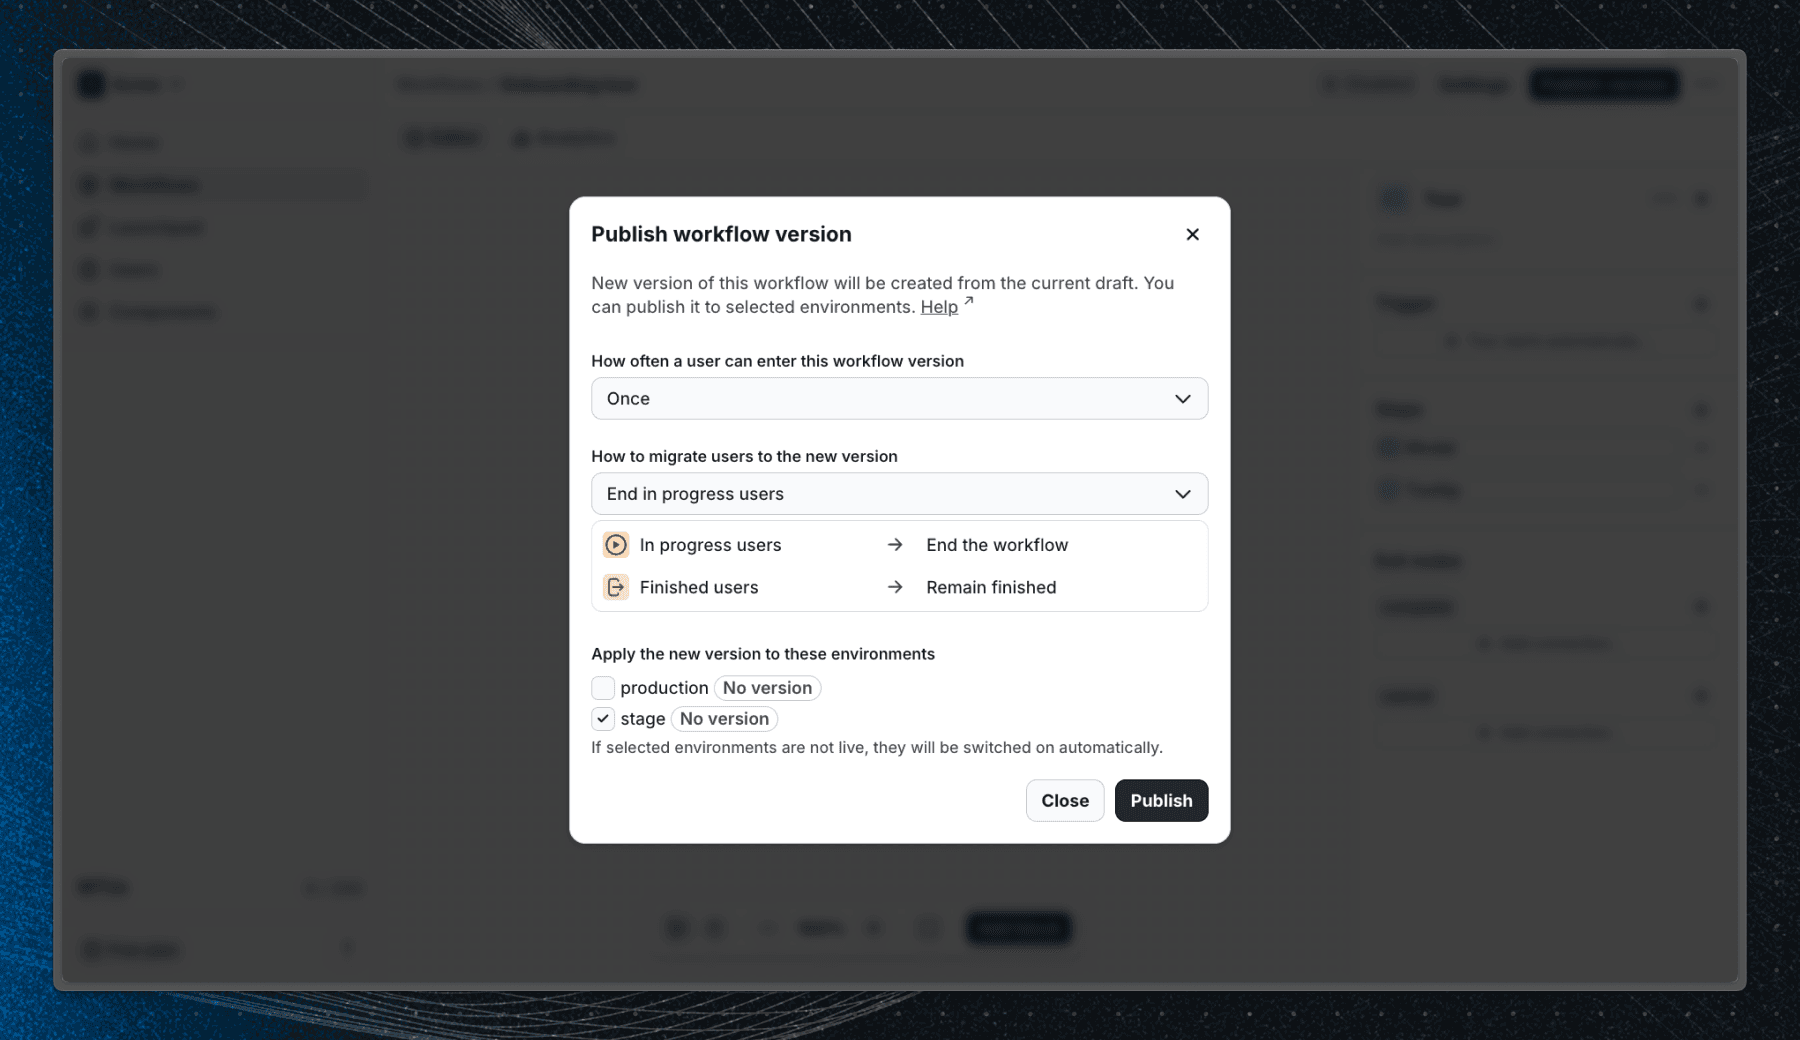
- Click Publish in the top-right corner.
- In the publish dialog, select a staging environment to limit exposure during testing.
- Visit your app and check that the survey appears as expected.
To reset the survey and run through it again:
- Open the Users page in Flows.
- Find your user profile and open the Workflows tab.
- Locate the survey workflow and click Reset progress.
- Refresh your app and trigger the survey again.
Learn more about testing workflows.
Publish to users
Once you're happy with your survey, publish it to production.
- Optionally configure user property filters in the Start block to target a specific segment. See the guide on targeting only new users for an example.
- Click Publish and select the production environment.
Your survey is now live. Responses will appear in the Analytics tab of the survey block as users start submitting.
View results
Once users start responding, open the survey block and click the Analytics tab to see the results.
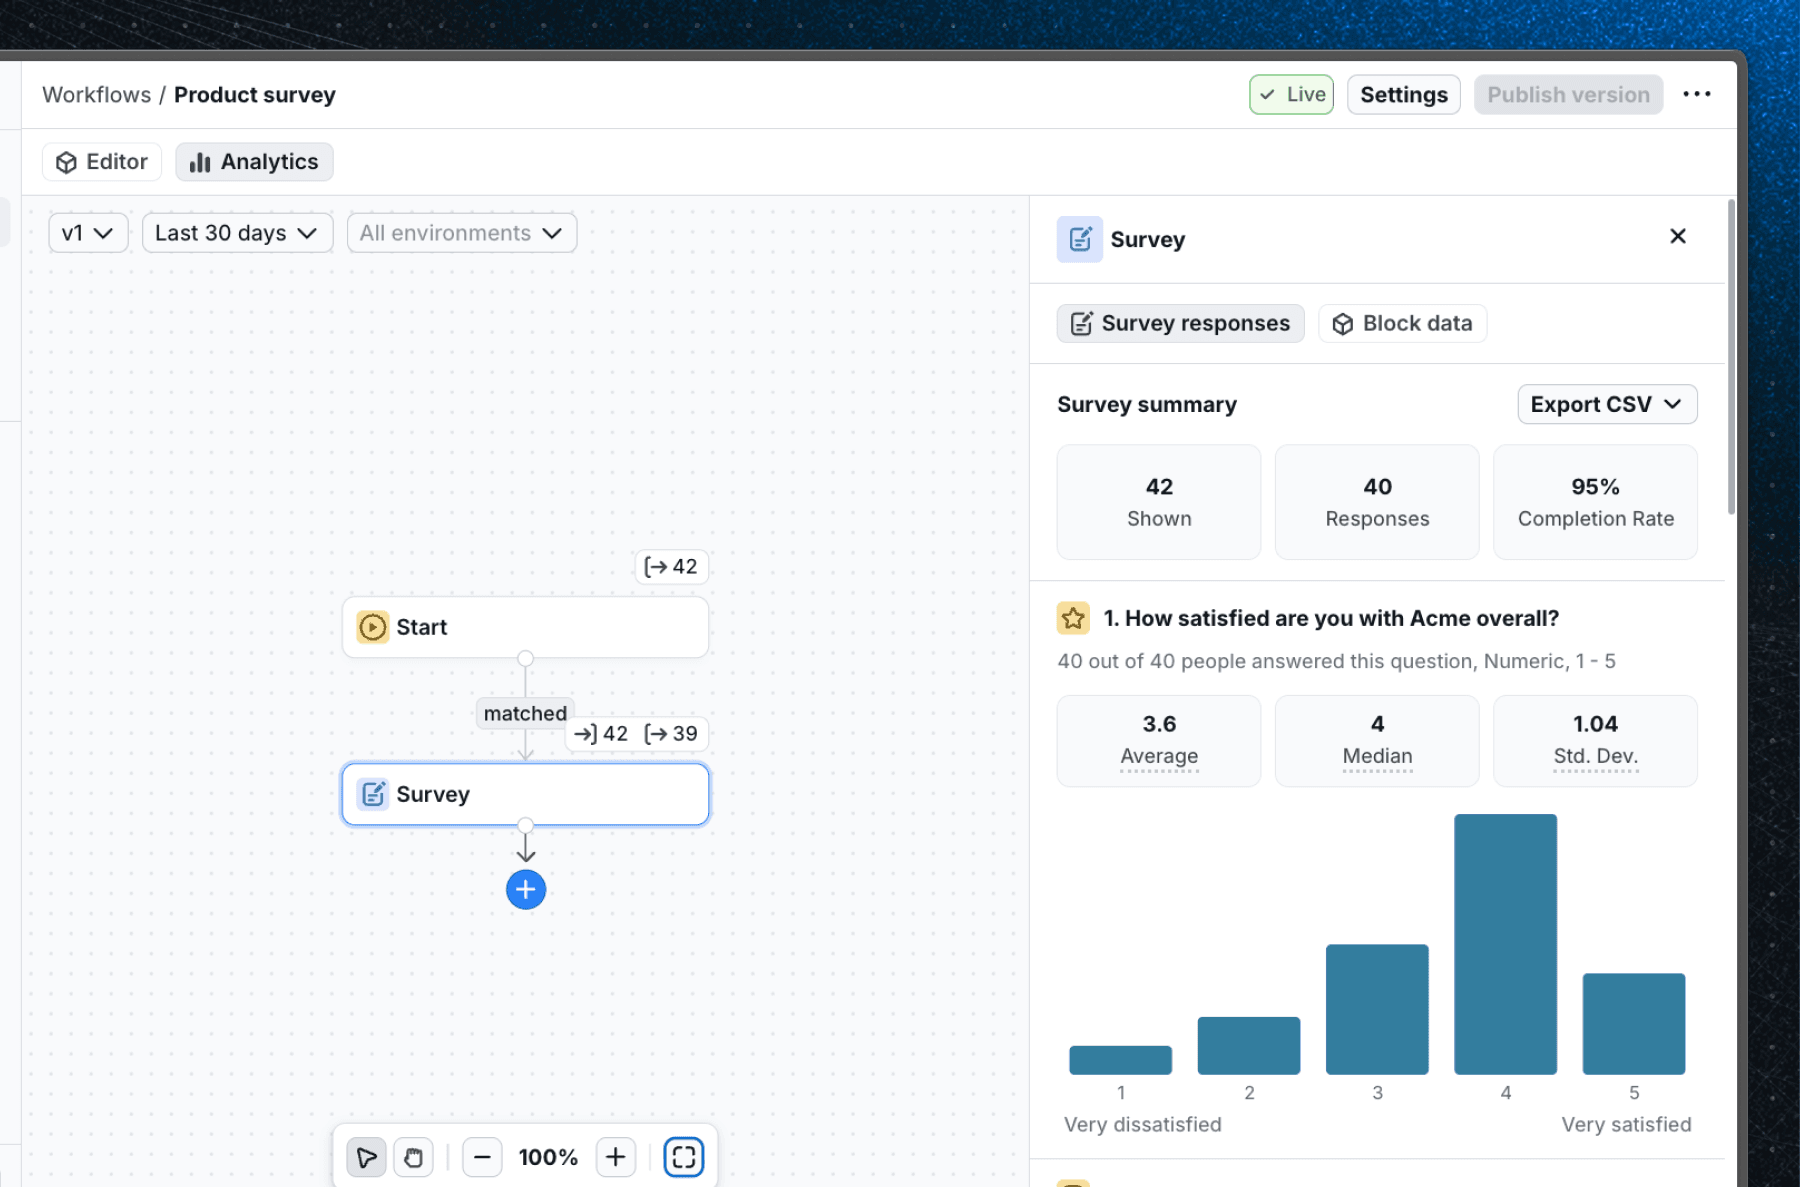
You'll see a summary at the top with the number of times the survey was shown, the number of responses, and the completion rate. Below that, each question has its own breakdown - rating distributions, choice option frequencies, and freeform text responses.
To filter results by date range or environment, use the controls at the top of the analytics view. To download all raw responses, click Export CSV.
See the survey analytics page for a full description of what's available.
Next steps
Now that you've created your first survey, you can:
- Add more question types like Single choice or Multiple choice for structured responses.
- Use a manual start block to trigger the survey from a button click or a specific user action.
- Export responses as a CSV from the analytics view.
Last updated on